Configuring Able+ for your organisation
You can make changes to the settings for your users within the Able+ Cloud settings administration area.
Accessing the Cloud settings administration area
To access the Cloud settings administration area, click the Admin option in the left-hand menu and then select Able+ settings in the main admin menu along the top of the page.
Please note, the place management: configure Able+ place settings action is required in a user’s permission set for them to access this feature.
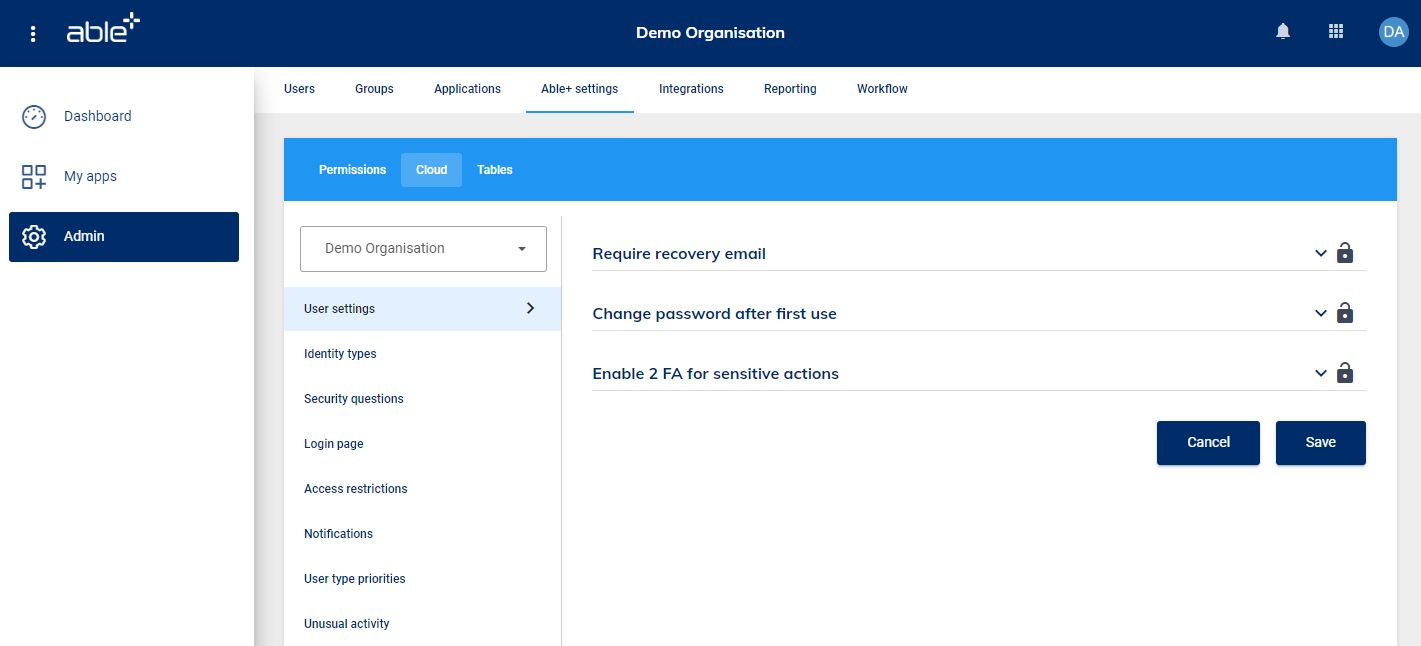
User settings
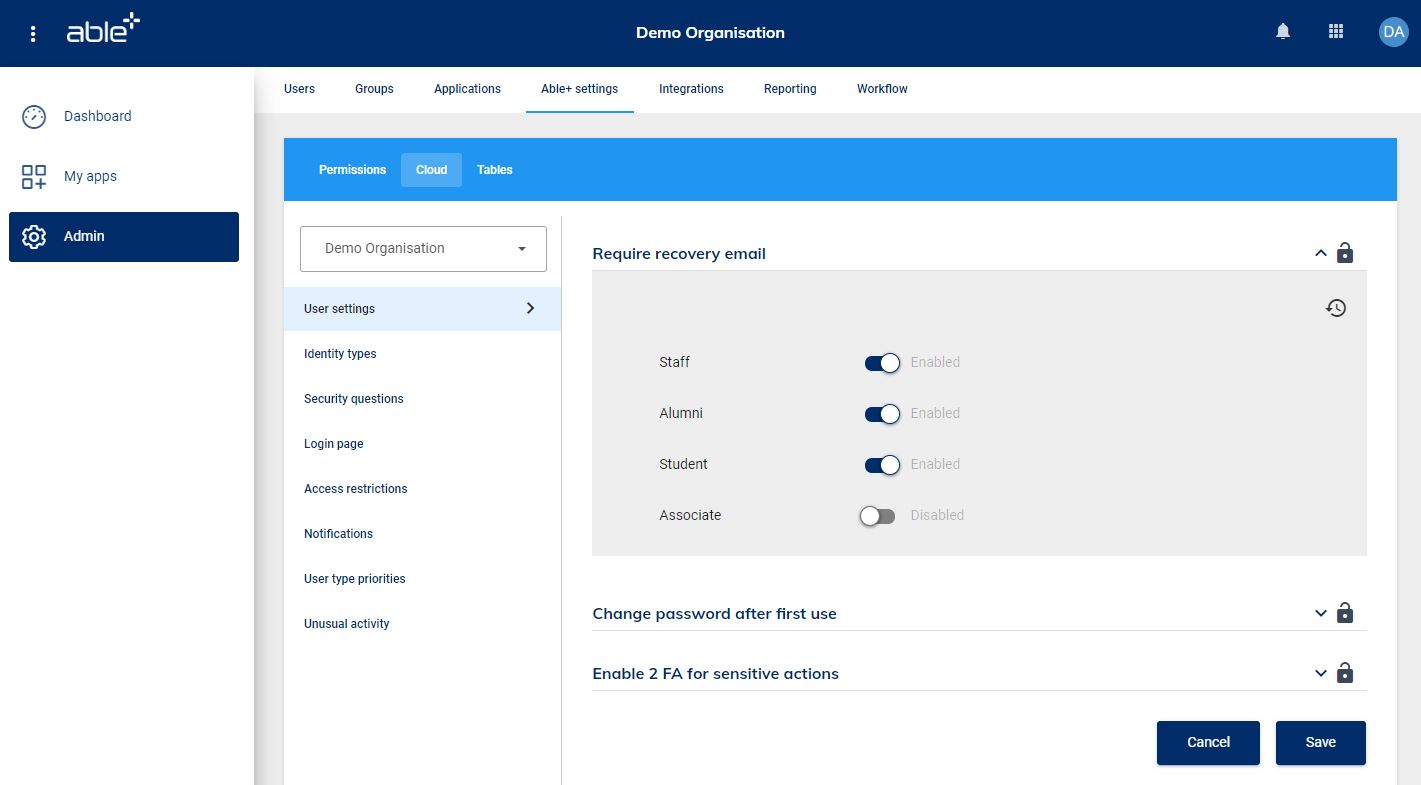
Require recovery email
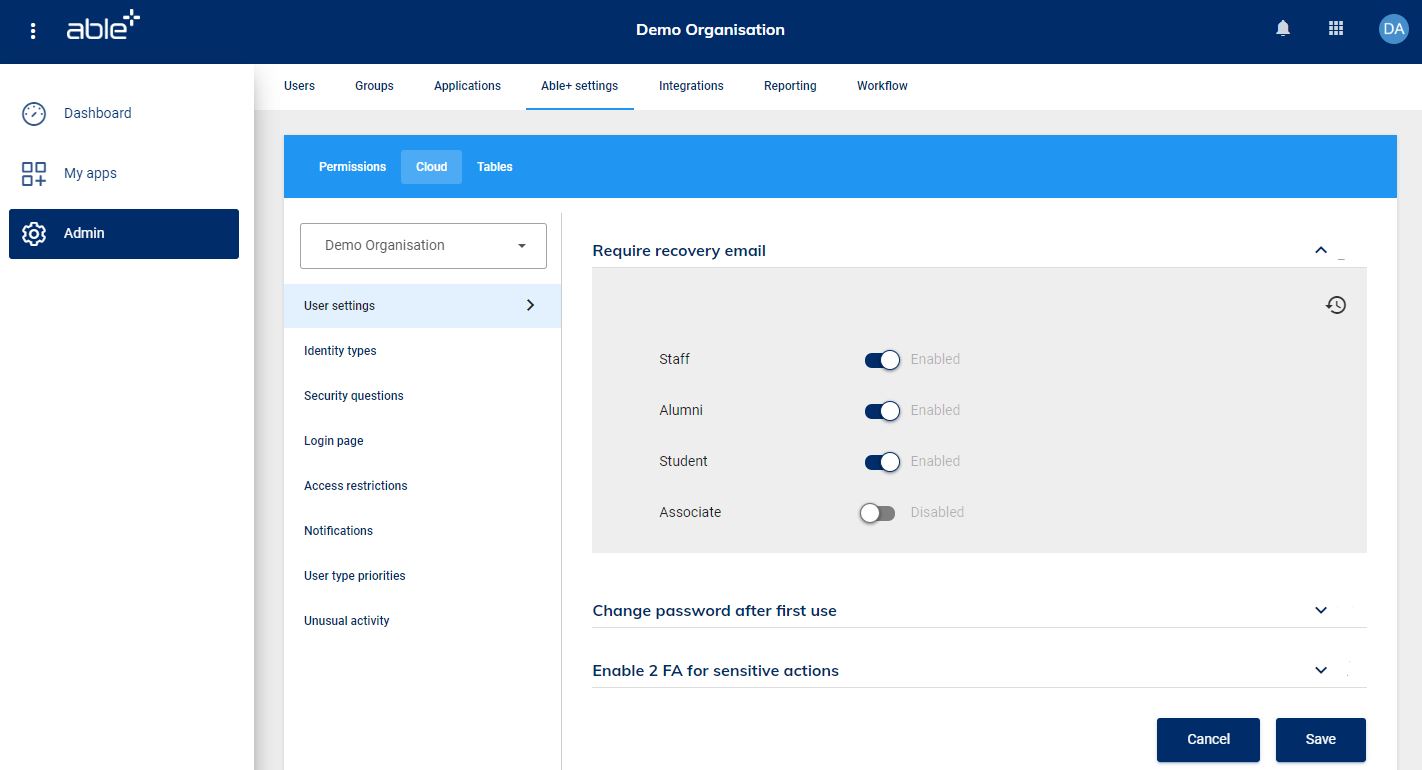
For each user type within your organisation you can decide whether the user will be prompted to enter a recovery email that will be used to allow them to reset a forgotten password.
When this option is enabled for a user type then those users will receive a reminder to add their recovery email when they log in to Able+.
Click on the toggle to switch between enabled and disabled for each user type. The user types that display will depend on your organisation.
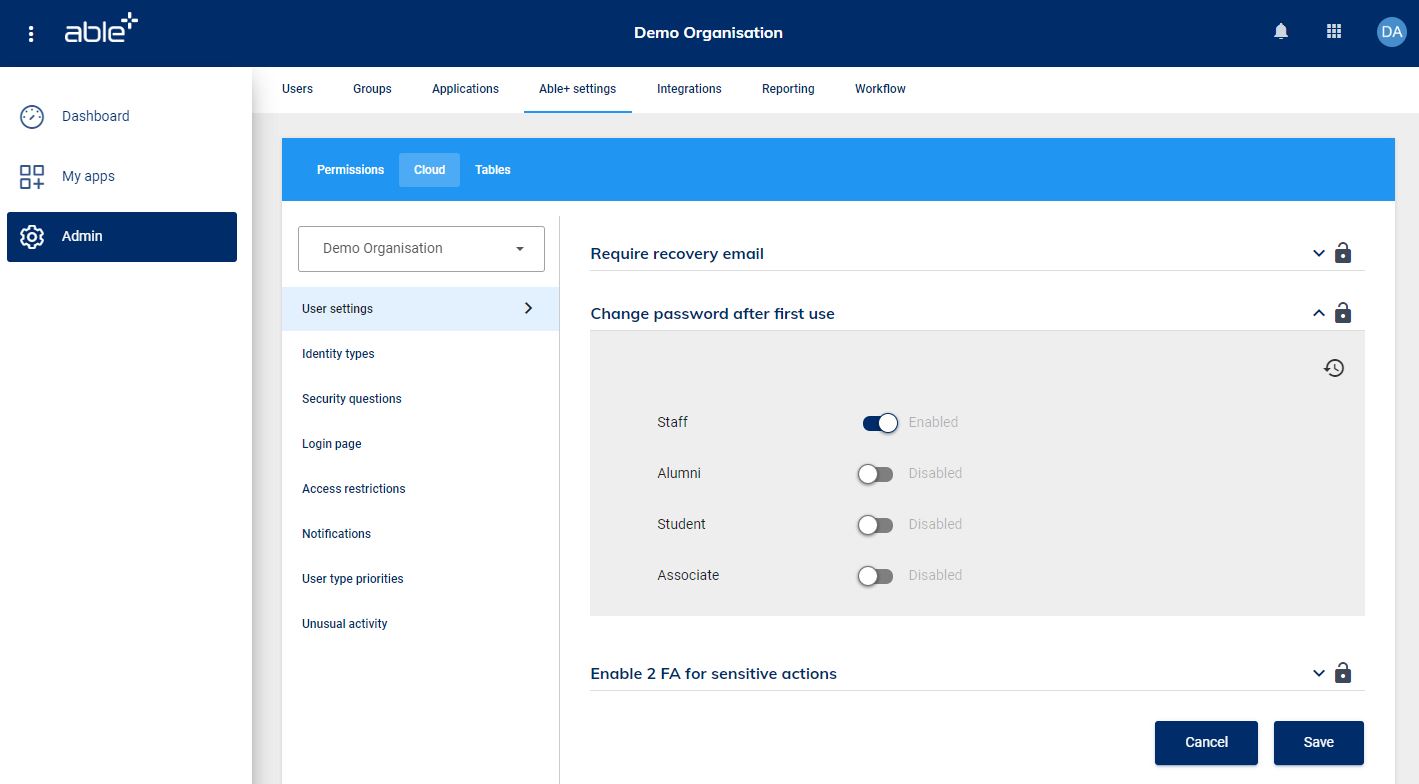
Change password after first use
For each user type within your organisation you can decide whether the user must change their original Able+ password.
When this option is enabled for a user type then those users will have to enter and confirm a new password after they first log in to Able+.
Click on the toggle to switch between enabled and disabled for each user type.
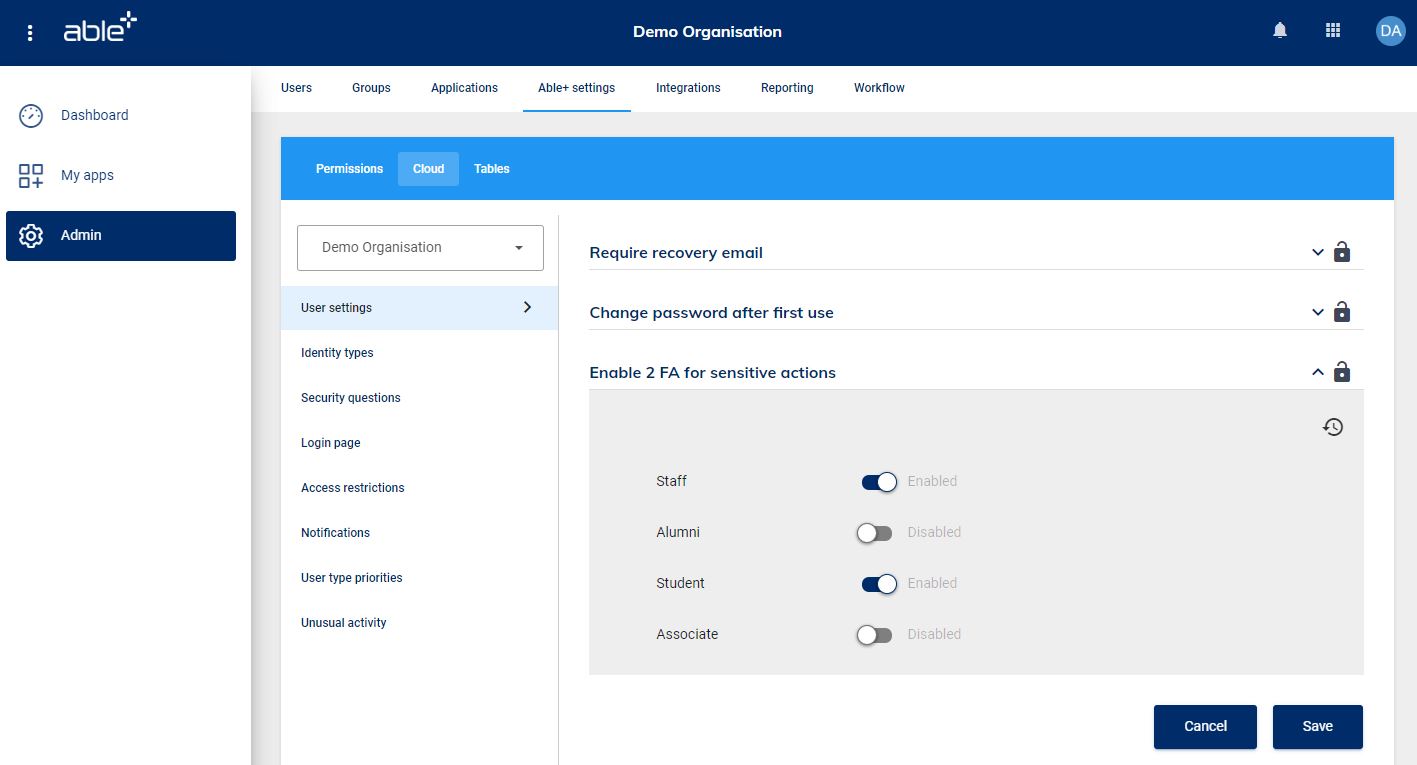
2 Factor Authentication (2FA) for sensitive actions
At Place level it will be possible to set whether additional authentication is required to perform sensitive actions within Able+.
If this feature is enabled, Able+ admins can choose to enable/disable this requirement for user types by navigating to Admin > Able+ settings > User settings: Enable 2FA for sensitive actions.
Where this option is enabled for a user type then those users will need to authenticate before performing any actions classed as sensitive. These actions include:
- Editing existing security questions and answers
- Deleting users individually
- Deleting users in bulk
- Viewing a user’s full details
- Uploading a CSV file
- Restoring users
- Changing sync settings
- Manual sync
Click here for help setting up and using 2FA with Able+.
Saving your changes
When you have finished making any changes to the user settings, click the Save button at the bottom of the page. Where your Able+ organisation is set up with a hierarchical structure then you can decide whether the changes you have made should just be at the top-level place or also changed in any child establishments within your organisation. You will only see this option in a top-level place within a hierarchical Able+ organisation.
Restore to default
If you want to reset any of the settings to their defaults then you can click on the restore option for that setting. The restore option only displays when the setting is expanded. In a top-level place you will also be asked if you want to make this change in any child establishments within your organisation.
Identity types
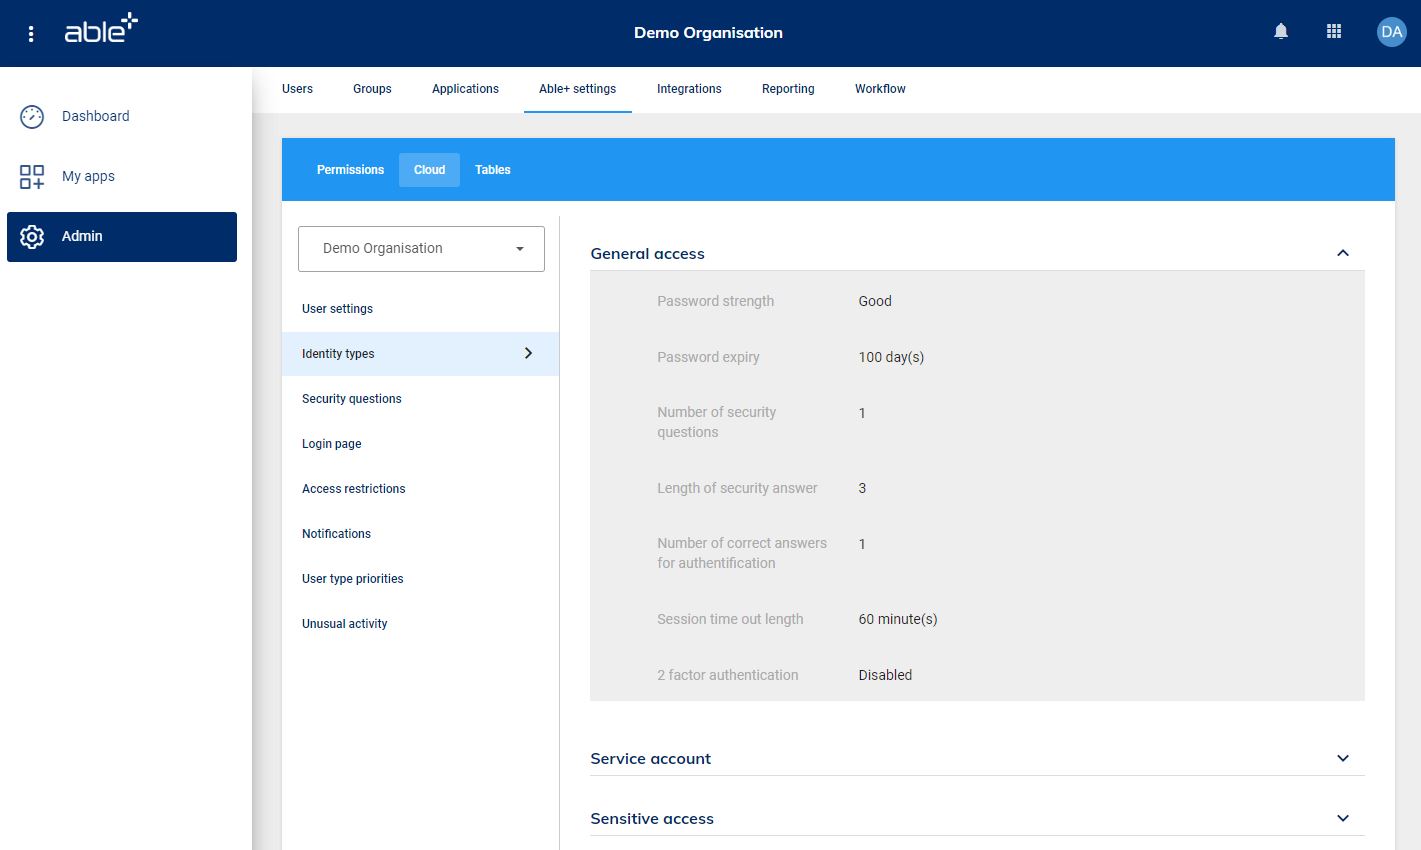
The identity types tab will show you the identity types available to your organisation and their associated security settings.
This information is provided for reference only - it is not possible to edit the identity types.
Access Restrictions
2 Factor Authentication (2FA) can be set for users depending on location or IP address. This feature will first need to be enabled at Place level.
Admins can then choose to enable 2FA on either a ‘needed’ or ‘not needed’ basis and configure the rules that apply by navigating to Admin > Able+ settings > Access Restrictions.
Geolocation
Where the Geolocation restriction is set to either 'needed' or 'not needed', you will be able to define an area on a location picker map.
- It will be possible to define more than one area
- It will be possible to see previously defined areas
- It will be possible to remove an area.
IP address
Where IP restriction is enabled on a 'needed' basis, then the list of IP addresses from which 2FA will be needed will be listed along with an option to add a new IP address. Where a user is not logging in from a listed address they will be required to log in based on their identity type settings. Where a user is logging in from a listed address then they will need to authenticate via 2FA regardless of their identity type settings.
Where IP restriction enabled on a 'not needed' basis then IP addresses from which 2FA will not be needed will be listed along with an option to add a new IP address. Where a user is logging in from a listed address they will be required to log in based on their identity type settings. Where a user is logging in from an address that is not listed then they will need to authenticate via 2FA regardless of their identity type settings.
Controlling settings within hierarchical organisations
Where your Able+ organisation is set up with a hierarchical structure then you can control whether the settings in any child establishments within your organisation can be edited.
If you do not want these settings to be edited then you can lock them from your organisation’s top-level place. To do this, click the unlocked padlock icon next to the setting you wish to lock.
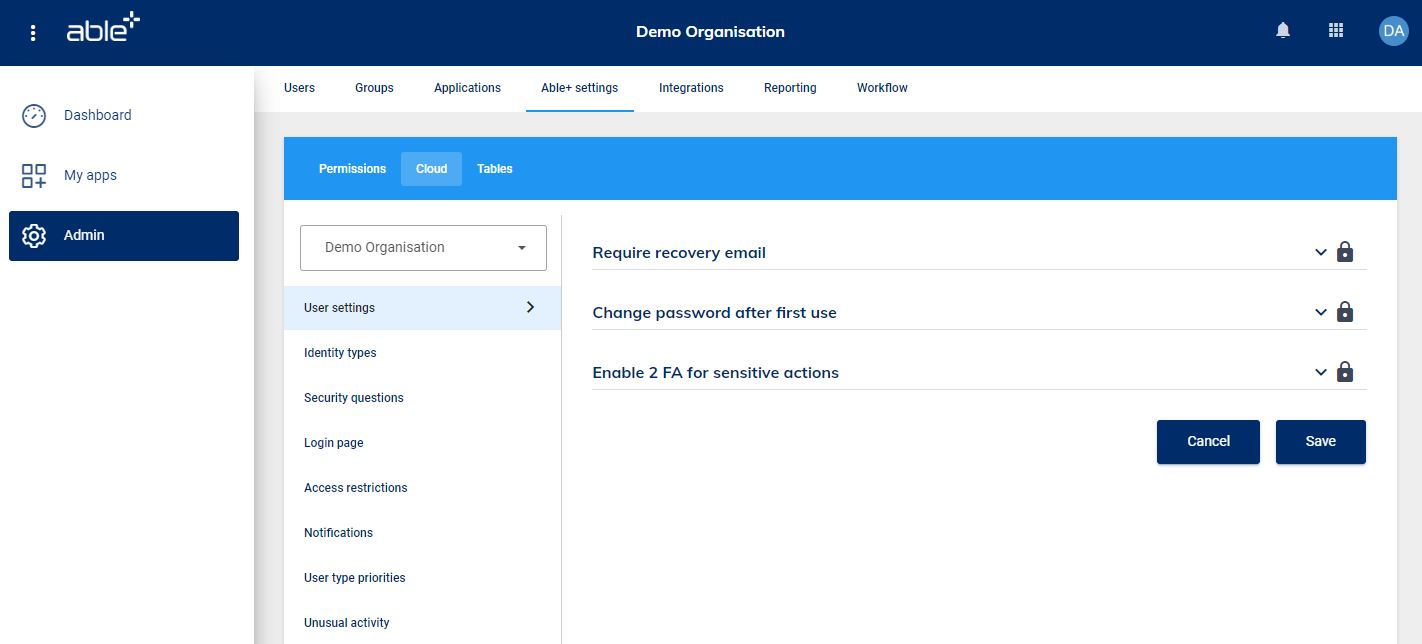
Clicking a locked padlock will unlock that setting.
Administrators in child establishments within your organisation will be able to view the locked settings but they will appear greyed out and it will not be possible to change them.
Custom data objects
If any custom data objects have been created for your organisation you will find them by clicking the Admin option in the left-hand menu and then selecting Able+ settings in the main admin menu along the top of the page and then clicking the Tables tab.
Please note: This will only be visible to anyone with either a view or manage custom objects action.
Permissions on custom objects
The following actions will need to be added to Able+ permission sets to access custom data objects:
Platform actions:
- Manage custom objects (a platform admin or user with this action will be able to create, view and manage all custom objects)
Place management actions:
- Manage custom objects (this will allow the user to view, edit, delete and create custom objects)
- Manage custom objects in child places (this will allow the user to view, edit, delete and create custom objects)
- View custom objects
- View custom objects in child places
Viewing custom objects
Within Able+ Settings, there is a Tables tab. Here there will be a list of custom objects (labelled Custom data tables) available in the place. These will be displayed alphabetically and will show who the custom object was last modified by and when.
There is a search facility in the top right corner which will allow you to search for a custom object. This will filter the list of custom objects to show those whose label contains the search string.
Where a user has permission to edit a custom object there will be an edit option in the actions column.
Viewing an individual custom object
To view an individual custom object, click on the name of custom object label. Any data records will be presented in tabular form. There will be a header row showing the labels of the fields in the custom object.
Where a user has permission to edit a custom object there will be an edit option at the top of the page.
Please note: It is not possible to delete custom objects
Editing a custom object
Where a user has the Manage custom objects action they will be able to edit the custom objects in the place(s) they have this permission.
When viewing a custom object, you can click the in the top right corner to edit the custom object.
Clicking on the edit icon at the end of a row will make the text of that row editable. You can then click the to save the changes or the
to cancel the changes.
To delete a row, click the next to the row you wish to delete. You will then see the message:
Are you sure you want to remove custom object?
Clicking ok will remove that custom object, clicking cancel will return you back to the custom object table.
This way of editing is most suited to making individual changes.
Making changes to the data in a custom object via CSV
For making a larger amount of changes to the data in a custom object, users with a Manage custom objects action will have an option (when viewing a custom object) to download the current data in the custom object, to download a template file which can be used to add data to the custom object, and to upload data to the custom object.
Download data
Clicking this option will download a CSV file of the current data in the custom object. The CSV file can then be edited and saved.
Download template
Clicking this option will download a template CSV file which contains the labels of the fields within the custom object. The CSV file can then be populated and saved.
Upload data
Clicking this option will allow the user to upload a CSV file to edit the current data in the custom object. Once this has been clicked you will be asked to upload your CSV file and whether you want to Replace existing data, or Add to existing data.
If you choose to replace existing data then the current data in the custom object will be deleted and the uploaded data will be added.
If you choose to add to existing data then the uploaded data will be added as new records after the existing ones.
| Glossary | |
|---|---|
| Child place/establishment | A separately managed part of an organisation such as a college within a university, an office in a different country or an academy within a multi academy trust |
| Identity type | The identity type controls a user’s security and access settings |
| Recovery email | An email address that can be accessed outside of Able+ that is used to send a link to reset a forgotten password |
| User type | The user type shows how a user relates to your organisation (e.g. student, employee) |
