Standard user guide to Able+ cloud
This guide explains all the functionality that is available to a user without administration permission on Able+.
It covers the following areas:
-
Logging in
-
My Resources
-
Personal settings
-
Dashboards
Logging in
You can log in to Able+ from https://able-plus.co.uk.
You may also be given a URL specific to your organisation for you to log in from.
2 Factor Authentication (2FA)
If you have 2FA enabled on your user type, you may be required to authenticate using two a 2-step verification process when logging in, or when performing sensitive administrative actions within Able+.
2FA via the authentication app
When you enter your username and password for the first time since 2FA has been enabled on your account, you will be prompted to set up your second 2-step verification method.
The Able+ authentication app is available to download form the Android Play Store and Apple App Store. Search for "Able+ authentication".
To setup 2FA with the authentication app:
- Enter your username and password into the Able+ login screen
- Download the Able+ authentication app onto your mobile, if you haven't already, and click NEXT
- You will be presented with a unique QR code - open the authentication app on your mobile and choose SCAN
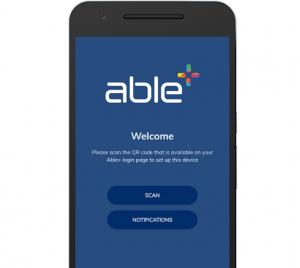
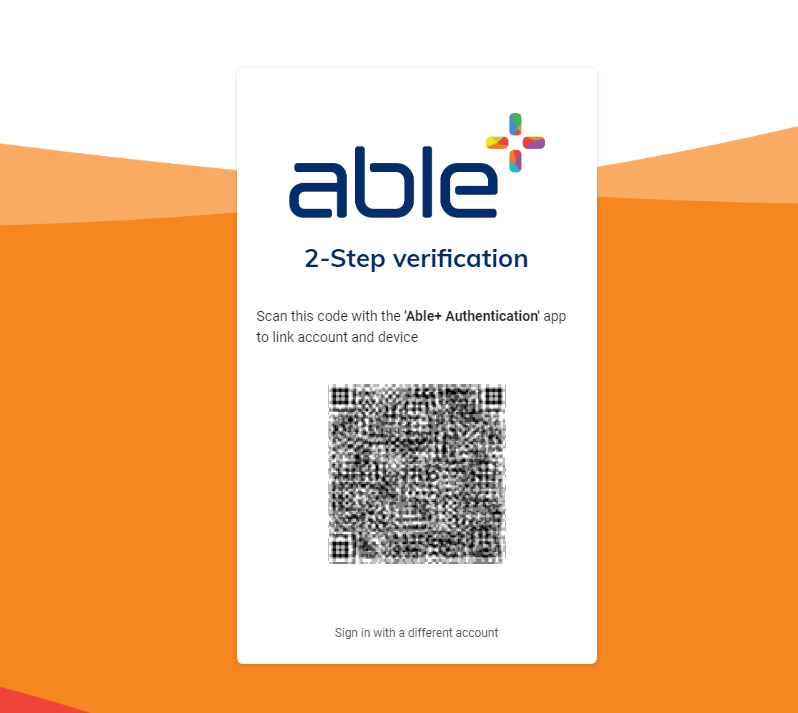
- Hold your mobile to the screen and Scan the QR code that is displayed
- After a few moments your mobile should successfully link to your account and a unique code will be sent to your app
- Enter this code onto the screen and click VERIFY

You're 2FA is now setup. From now on, each time you enter your Able+ username and password, a unique code will instantly be sent to your app to enter on the screen.
2FA with SMS
If your Able+ Place has SMS enabled for 2FA, then you will have the option to also authenticate via this method.
To setup 2FA with SMS
- Enter your username and password into the Able+ login screen
- Choose the SMS option from the next screen and click CONTINUE (if you have more than one number in your Personal settings, you will be asked to choose your preferred number from a displayed drop-down menu)
- A code will now be sent to the mobile via SMS - enter this code onto the screen and click VERIFY
You're 2FA is now setup. Now each time you enter your Able+ username and password, you will be sent a unique code to via SMS to the same mobile.
Recovery email address
When you first log in you may be asked for a recovery email address if this requirement has been set up for you by your organisation. This is the address an email will be sent to if you have issues with logging in such as if you forget your password. As such you should ensure that it is an account that you can access without needing to first log in to Able+.
If you enter an address at this point it will then be stored in your profile. If you do not enter an email address then you will see a reminder each time you log in.
Whether or not you are prompted to add a recovery email address, we strongly recommend you do as it will make it easier should you forget your credentials at any point.
You can add or edit your recovery email address at any time in your personal settings area. See Personal settings section below for further information.
Security questions
Security questions allow users to reset their own passwords by answering a series of questions.
If security questions have been enabled on your account, you can choose your security questions and set answers on your first log in. You can also manage your security questions at any time from your Personal settings area.
Once your security questions have been setup, you can choose this method for resetting your password by clicking on the Forget password? link under the Able+ Login button.
My apps
Your My apps page will allow you to access any applications that you have permission to through Able+ without the need to enter additional credentials.
Your organisation has probably set that you land on your My apps page when you first log in to Able+. You can also access it from the My apps option in the left-hand menu.
Accessing an application
Where an application has been configured for you by your organisation then you can click on its tile on your My apps page and a new tab or window will open where you will be logged in to that application.

If your organisation has not configured the application for you then you will see three dots in the top right corner of the application tile. Clicking here will allow you to configure the application yourself.
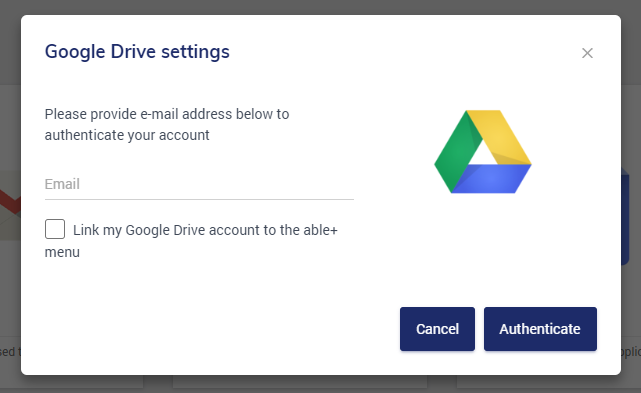
Where you have a large number of applications on your My apps page you might want to use the search option at the top of the page. Start typing and any matching applications will be displayed.
To see all applications again, just remove the text from the search field.
Adding applications to My apps
In addition to the applications that your organisation has assigned to you that you can see by default on your My apps page, you may also have had other applications made available to you.
If you have other available applications then you can add these to your My apps page by clicking the add app icon at the top of the page.
The Add application dialog will display showing the apps that are available for you add. Click on the add icon next to any application that you want to add. It will then show as a lozenge at the top of the dialog.
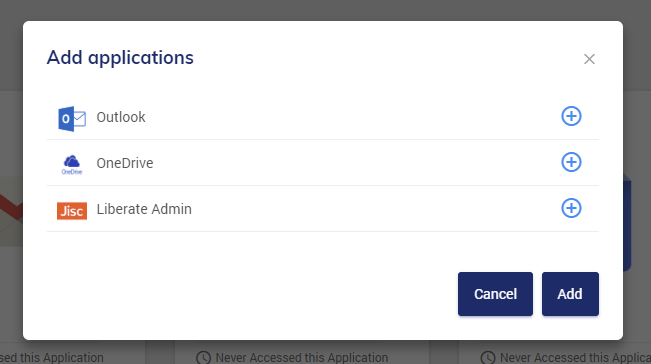
When you have finished adding applications click the Add button. The application(s) will appear on your My apps page ready for you to configure if needed.
Once you have finished reordering the tiles, click Save.
Quick links
The Quick links icon on the main Able+ toolbar allows you to access the Quick links side bar. This can give you direct access to up to 12 applications.
You can edit the applications that appear here in your Personal settings area. See Editing Quick links section below.

Personal settings
Your Personal settings are accessed by clicking on your avatar on the right of the Able+ toolbar (if you have been given permission to access them).

You will land on your Profile settings tab and can also click to access the other areas of your personal settings: Other information, Quick links and Groups.
Your Personal settings is also where you go to change your Able+ avatar.
Profile settings
Here you will see the basic information that is stored about you in Able+.
If you have been given permission then you will be able to edit some or all of these fields. Click Save to update your changes.
This is where you can enter (and edit) your recovery email address if you haven’t already done so. (See Recovery email address section above.)
Profile settings - change your password
The option to change your password is found in your Profile settings. You may need to scroll down the page to see it.
Click Change password and you will see the password reset dialog.
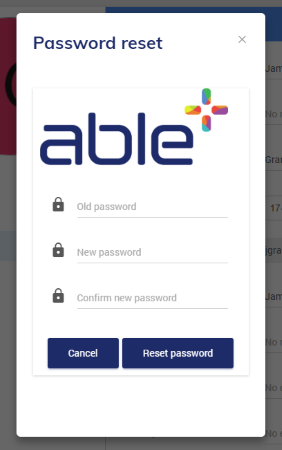
Enter your current password in the Old password field.
Then type the password you would like in the New password field. The password you enter will be checked against your identity type to ensure it is strong enough. (Please note that passwords much be at least 6 characters in length.)
Once you have a password that is strong enough, enter that same password into the Confirm new password field and then click the Reset password button.
Other information
In the Other information section there may be additional details if your organisation has chosen to add these.
If you have been given permission then you will be able to edit some or all of these fields. Click Save to update your changes.
Editing Quick links
The Quick links tab allows you to choose which applications are available directly from the Quick links side bar accessed by clicking the Quick links icon on the main Able+ toolbar.
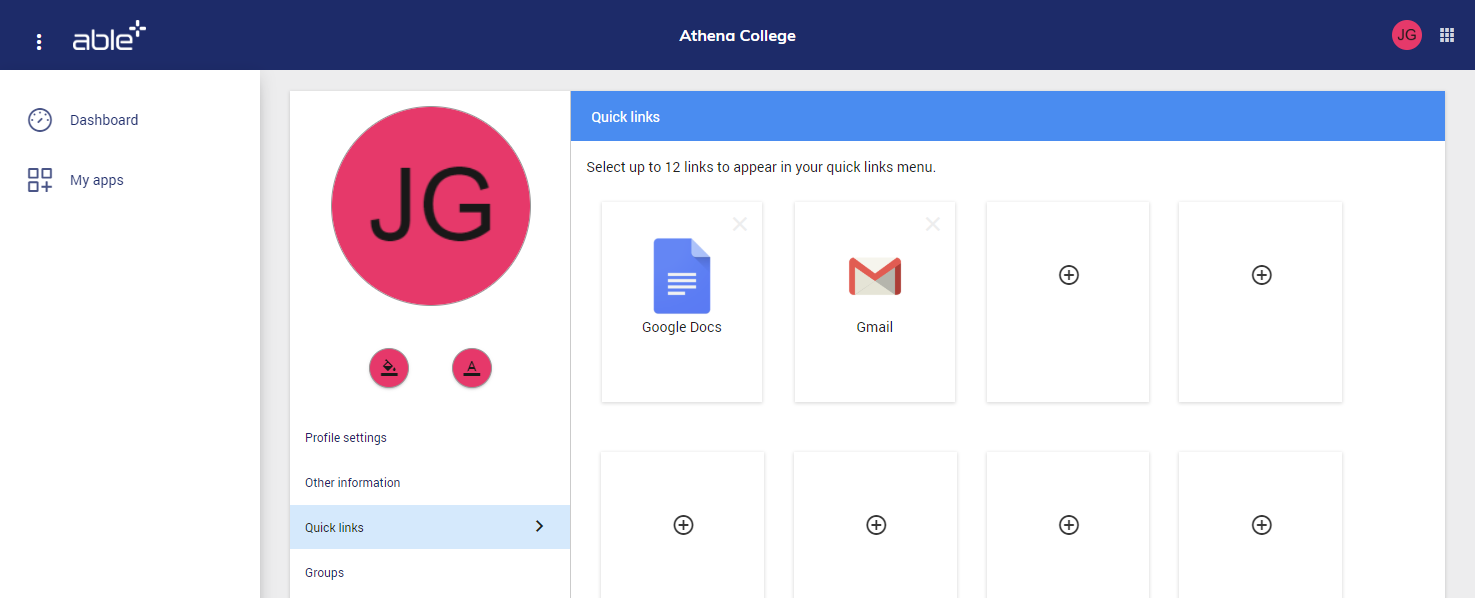
By default, all the applications on your My apps page will appear here.
You can drag and drop the applications to change the order that they are displayed in.
You can remove an application from Quick links by clicking on the x in its top right corner.
You can add an application by clicking on one of the Add quick link icons . You can have a maximum of 12 applications on your Quick links so if you already have 12 added then you will not see an add option.
Once you have clicked the add option, click the application you want to appear on your Quick links and then click Save.
Groups
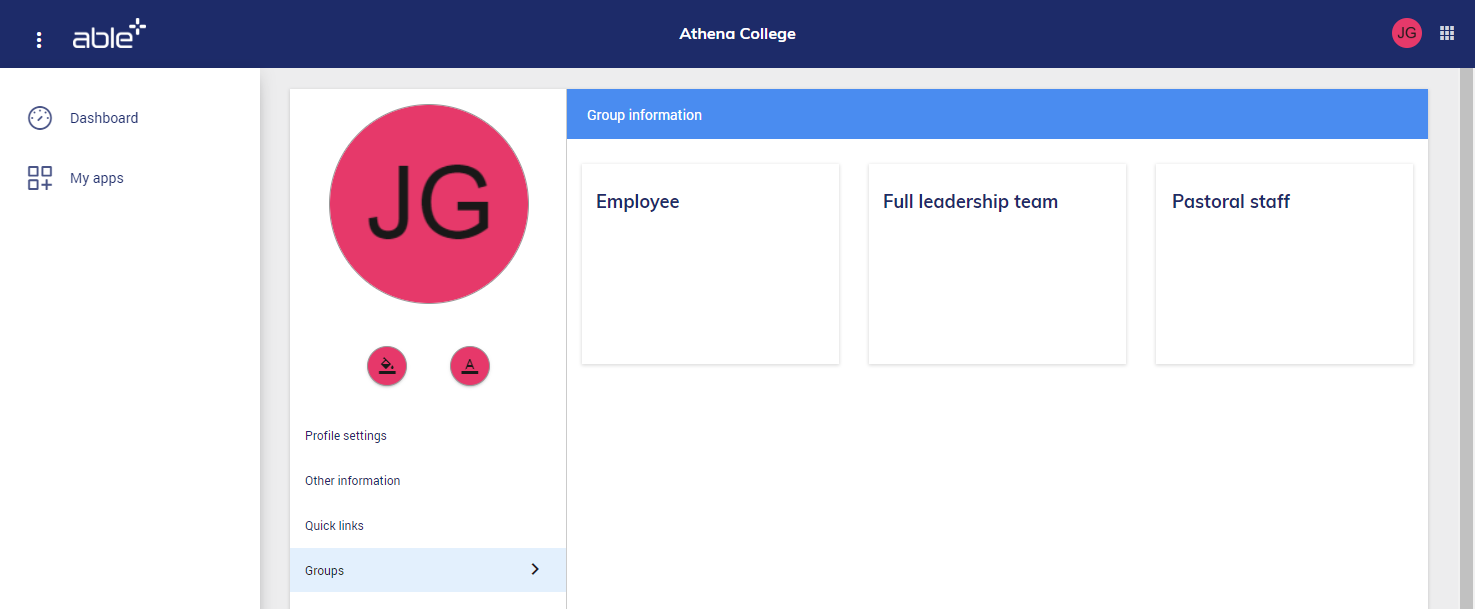
The Groups information tab will show you a list of groups in Able+ that you are a member of.
Notification settings
When a specific action is performed within Able+ a notification will be triggered, and a notification banner will be instantly displayed on the right-side of your screen.
All your notifications can be viewed by clicking on the Notification icon in the top-right (the bell icon) of your screen. A red indicator will display on this icon when new notifications have been received.
You can see the notifications your user has been setup to receive by going into your Notification settings. You will also be able to set the following personal preferences:
- Email notification – Receive an email copy of each notification you receive to the communication email address specified in your Profile settings
- Daily digest email – Receive a single email around 5pm each day with a list of all notifications received
- Mute notifications – Choose to mute non-compulsory notifications so that pop-up banners do not display on the screen, when you are logged in.
Linking accounts
If you have more than one Able+ account you can link them together (unless this setting has been disabled by the organisation), so that once you are logged in with one account you will be able to switch between those accounts without the need to log out and log in again.
To link two accounts together click the Link existing account option.
You will then need to select whether you want to complete this process via notification or email and provide your username and password for the required account you want to link.
If you choose to complete the linking process via a notification then you will see the following message:
Please login as [username of linked account] and follow the instructions in the notification to complete the link between the accounts.
The notification will then be sent to the account you are linking to and you can close the message.
If you choose to complete the linking process via email but no recovery email address is set for the account you wish to link to you will see the following message:
Unfortunately the account you are trying to link with does not have a verified recovery email address. Please choose the notification option instead.
You can then close this message and choose the notification option instead.
If you choose to complete the linking process via email and a recovery email address is set for the account you wish to link to you will see the following message:
An email has been sent to the recovery email address for [username of linked account]. Please follow the instructions in the email to complete the link between the accounts.
The email will then be sent and you can close the message.
Completing the linking process via Able+ notification
If you choose to complete the linking process via a notification then you will see the following message:
Please login as [username of linked account] and follow the instructions in the notification to complete the link between the accounts.
The notification will then be sent to the account you are linking to and you can close the message.
You will then need to log in to the Able+ account you are linking to. A notification will appear in the notifications area with the heading Account link request. The notification message will read:
A request has been made to link this account with [username of original account]. If you wish to proceed with this process, please click the option below. Alternatively, click Decline.
You can then click the Link accounts option, or alternatively you can click the Decline option.
When you click Link accounts the accounts will be linked and when you next log in to either of the accounts you will be able to switch between them.
Completing the linking process via recovery email
If you choose to complete the linking process via recovery email address you will receive an email to the recovery email address of the account you are linking to with the subject Able+ account link request. The email content will read:
A request has been made to link the Able+ account [username of receiving account] with the account [username of requesting account]. If you wish to proceed with this process, please click the option below. Alternatively, click Decline.
You can then click the Link accounts option, or alternatively you can click the Decline option.
When you click Link accounts you will be presented with a web page that states:
The accounts have been linked.
When you next log in to either of the accounts you will be able to switch between them.
Viewing linked accounts
If you have linked Able+ accounts, the username of the accounts that you have linked to (together with the display name of the place where the account exists) will show in the linked accounts area in your personal settings.
Switching between linked accounts
If you have linked Able+ accounts then when you click on your profile image in the main Able+ toolbar you will have a Switch accounts section.
Here you will see a list of the accounts linked to the account you are currently logged in to.
Each account will show the profile picture, username and user’s place display name.
When you click on one of the linked accounts you will then view Able+ as if you are logged in to that account. The place name will change to reflect the account you have switched to, the profile image will change, and all your settings and access will also change to reflect that of the selected account.
Changing your avatar
You can choose to use your initials as your avatar or to upload an image to use.
Formatting your initials
You can change the colour of your initials by clicking the background and text options under the large view of your avatar.
Once you have selected background or text then you can use the rainbow slider to select a general colour and then pick the exact tone or shade required from the main colour square.
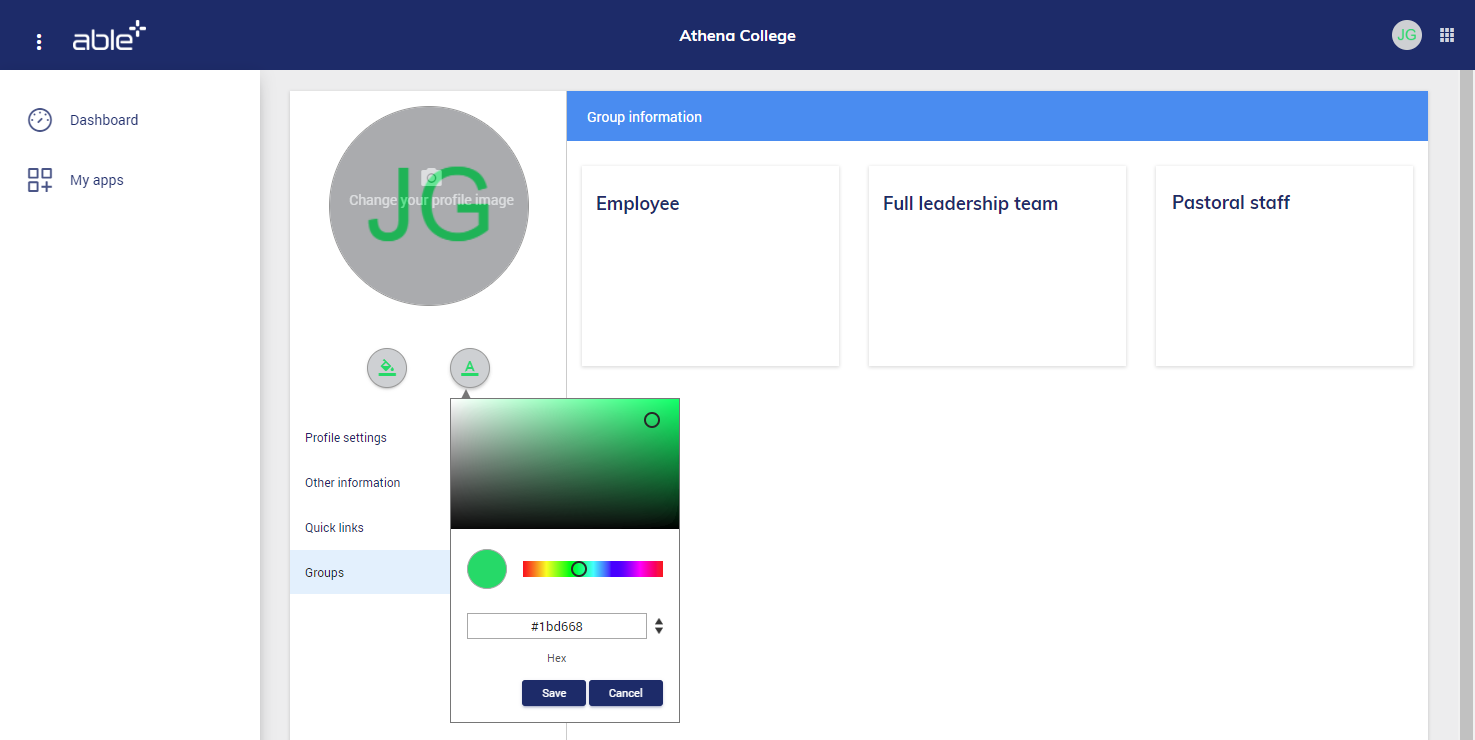
Alternatively, you can enter a colour code in Hex, RGB or HSL format. To change between formats, click the up and down arrows to the right of the code field .
When you have selected your colour, click Save.
Uploading an image
To upload an image to use instead of your initials, click on the large version of your avatar and you will be able to browse for the image you want to use.

Select the required image and then click Open. Accepted file types are .jpg and .png (lowercase only).
Once you have added an image you can change it in the same way or click the Remove image option beneath your avatar to return to using your initials.
Dashboards
Able+ allows you to create one or more dashboards to add personalised information and access to functionality directly from within the product. A dashboard is built by adding one or more widgets which can then be customised to show different content.
Click on the Dashboard option on the left menu to access your dashboards
Creating a new dashboard
To create a dashboard, select Create from the dashboard options dots in the top right corner.
The Create dashboard sidebar will open on the left of the screen.
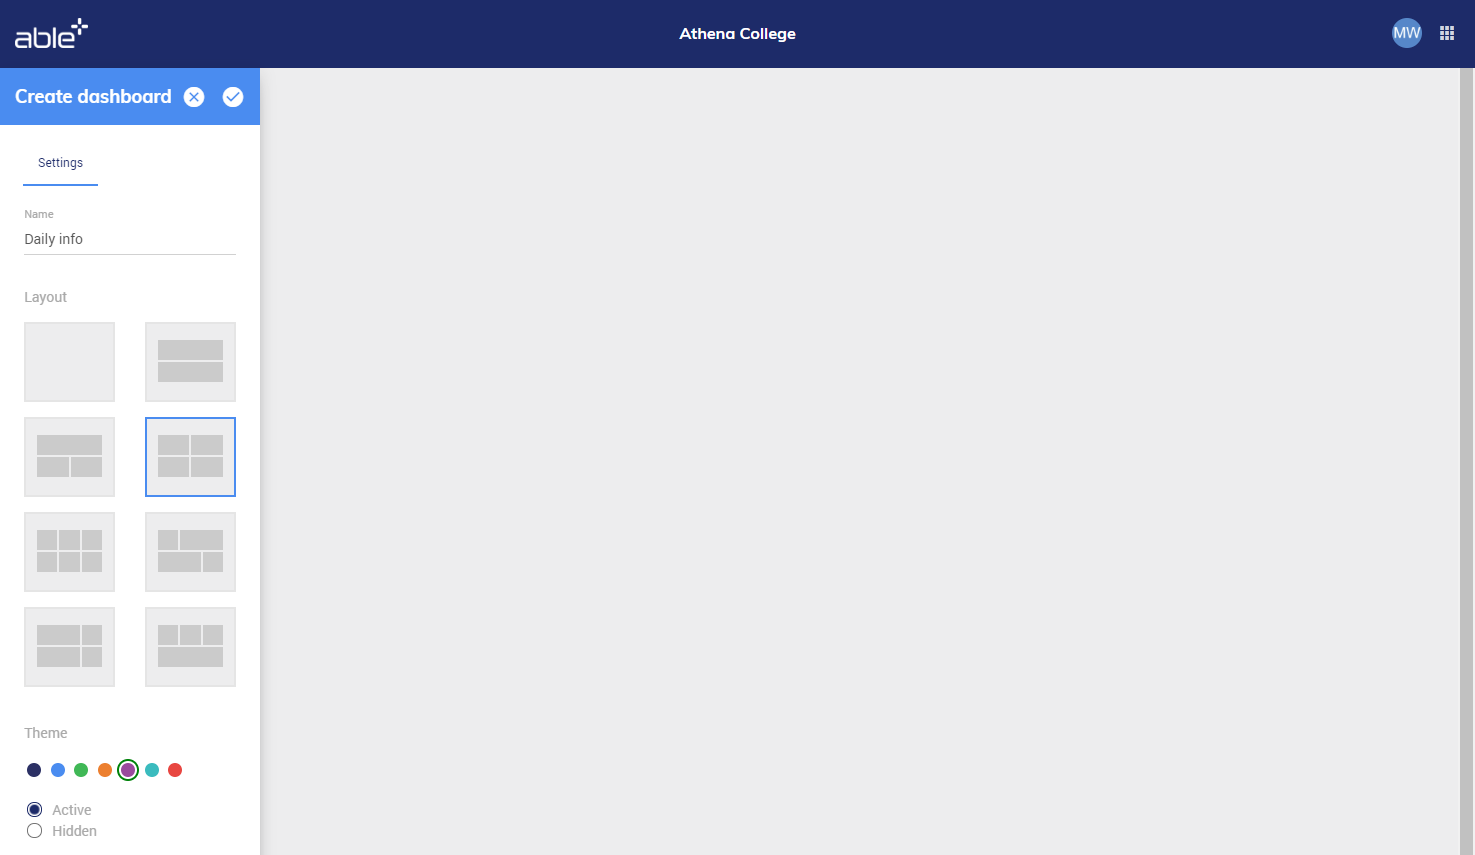
Give your dashboard a name and then choose a layout to guide how the widgets can be arranged. The thumbnail of each layout gives an idea of where they widgets can be placed on the page.
The first ‘blank’ layout template allows you to choose the size of each widget rather than this being controlled by the template. See Resizing widgets section below.
You can also choose a colour theme.
When you have finished, click the save changes tick at the top of the sidebar.
You will then be able to add widgets to your dashboard.
Widget types
The following widget types can be added to your dashboard:
-
Free image - allows you to draw or upload a single image
-
Free text* - allows you to type or paste text
-
Link - allows you to add one or more web links
-
Embed - allows you to paste code from an external source (e.g. youtube) to embed content
*You can switch a free text widget to free image mode if you want to add images to your text.
Adding widgets
You can either add a widget when you create the dashboard or at any point after.
If you have just created your dashboard then you will see that a Widgets tab has appeared next to the Settings tab - click this to add widgets to the dashboard.
If you are viewing an existing dashboard, select Add widget from the dashboard options dots in the top right corner - this will open the widgets tab in the edit dashboard sidebar.

You can either configure the widgets as you add them or save the dashboard and then configure them later. See Configuring widgets section below.
When you have finished, click the save changes tick at the top of the sidebar.
Configuring widgets
If your widget is not currently in configuration mode you can access this mode by clicking the edit options dots in the top right corner of the widget.
Each widget can be given a title that displays in the widget header. By default this is the name of the widget. Just click in the widget title field to edit the text.
Each widget is configured differently, as described below.
Free image widget
The free image widget includes a drawing canvas with basic paint tools to create an image. You can also click the open icon in the bottom right corner to browse and select an image to insert.
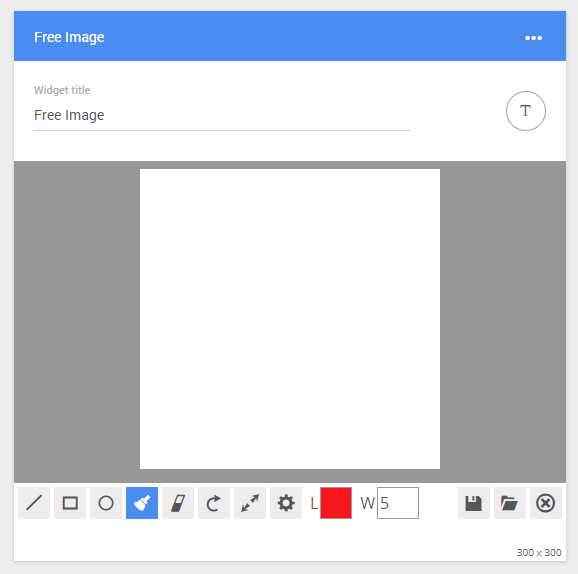
When you see a message asking you how to paste, select the Replace all option.
Alternatively you can drag and drop an image from a folder directly onto the image canvas.
Click the save button in the bottom right corner when you have added your image. This will put the widget back into view mode.
Please note, it is not possible to edit an image you have drawn in the free image widget. If you want to replace the image in the widget, configure it and draw or add a new image.
Free text widget
The free text widget includes a toolbar with simple text formatting options and a text entry area.
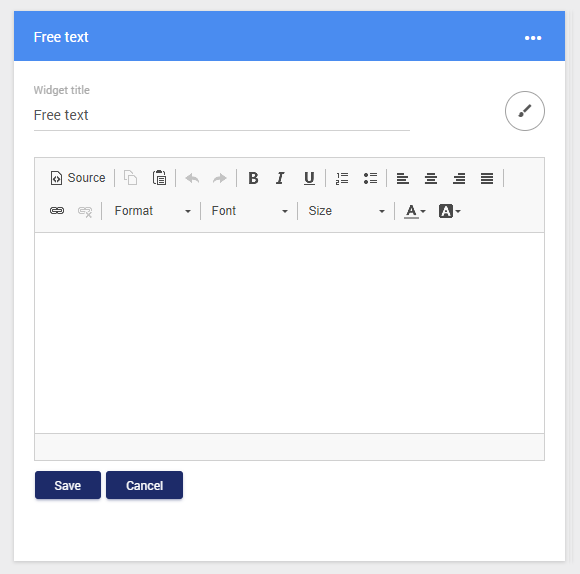
If you wish to add an image with your text then you can click the open image editor icon to access the canvas (see Free image widget section above). When you click the save button
you will be returned to the text entry screen with the image added to your content.
If you then want to resize an image, right clicking on the image to access its properties. Type in the size you want in the width or height box. (It will automatically stay in proportion).
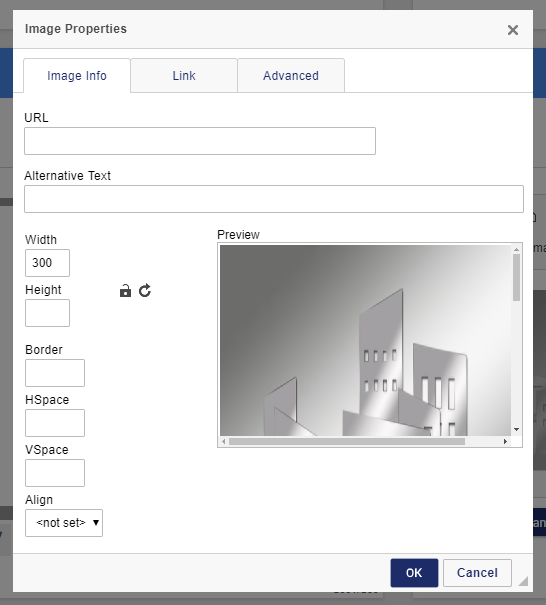
Click Save when you have finished editing your free text widget.
Link widget
Click the add link icon to add a new link.
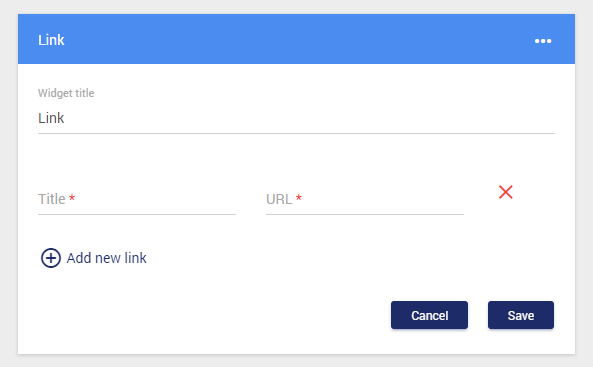
In the title field type the text you want to appear as the link.
In the URL field type or paste the web address you want the link to go to. (Links open in a new tab / window.)
A link can be removed from the widget by clicking the remove link icon to the right of the link.
When you have added all the links you need, click Save.
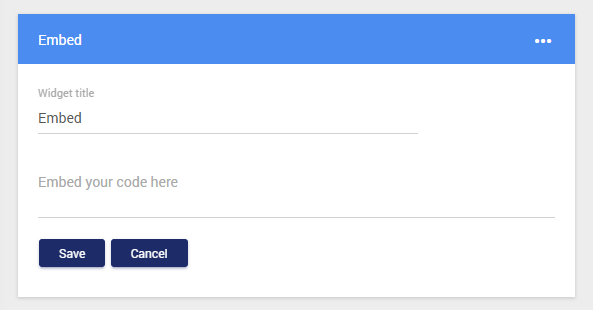
Embed widget
Paste the code that you have copied into the embed code field. Then click Save.
Deleting widgets
Widgets can be deleted when the dashboard is in edit mode. Select Edit from the dashboard options dots in the top right corner. Each widget will have a remove widget option in its top right corner
. Click this to delete the widget from your dashboard.
Editing dashboard properties
If at any time you want to change the layout template for your dashboard, its theme colour or its name then you can edit its properties. Select Editfrom the dashboard options dots in the top right corner - this will open the settings tab in the edit dashboard sidebar.
You can then make changes in the same way as when you originally created your dashboard.
Rearranging widgets
When you have the Edit dashboard sidebar open then you are able to change the order that the widgets display on the page.
To move a widget, click and drag the coloured heading area slowly across the page. As the widget enters an area it can be moved to you will see a faint ‘guide’ version of the widget in the new position. Drag and drop the widget in to the desired position.

When you have finished rearranging the widgets, click the save changes tick at the top of the sidebar.
Resizing widgets
In most of the widget layout templates the dimensions of the widget are controlled automatically.
However, if you choose the first ‘blank’ layout then you will have manual control over the size of each widget.
When using the blank layout you will see a resize triangle in the bottom right corner of each widget in edit dashboard mode. Click and drag this to make the widget the width and height you require.
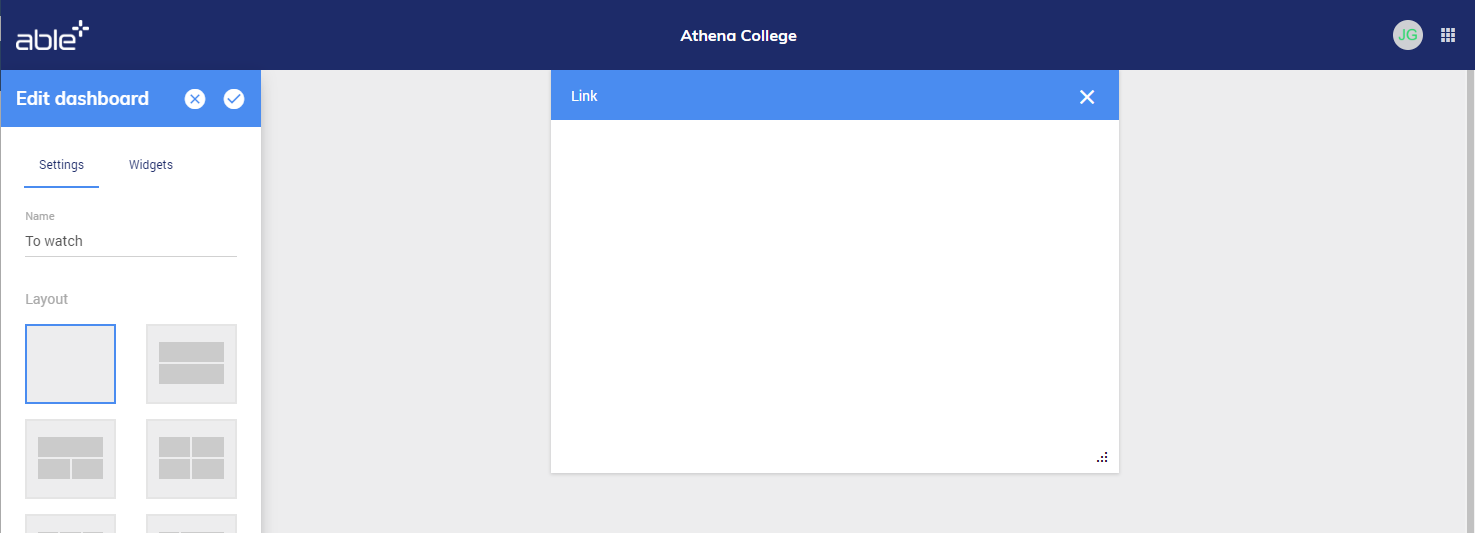
Click the save changes tick at the top of the sidebar when you have finished.
Active and hidden dashboards
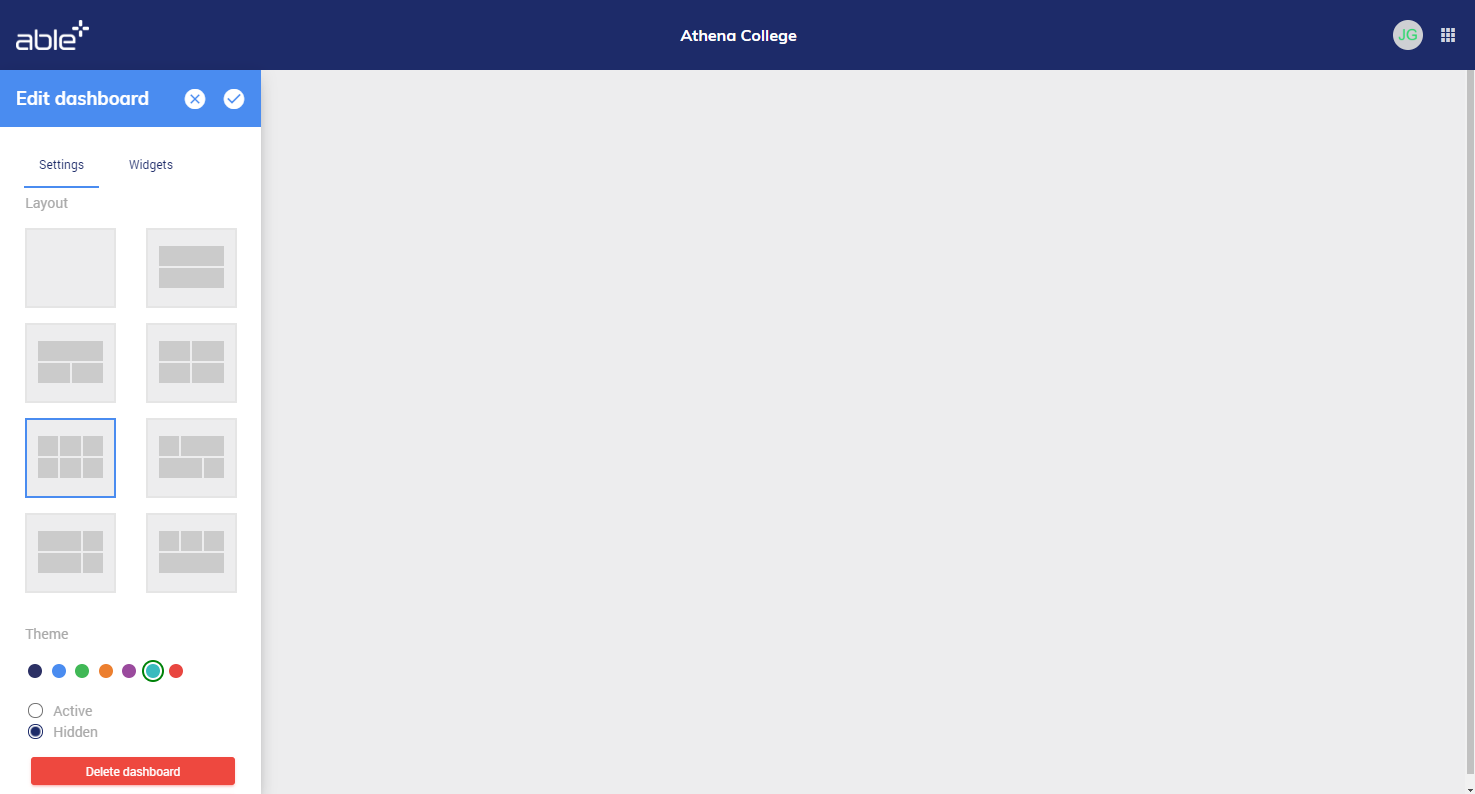
If you have created a dashboard that you don’t currently need to use, you can choose to hide it so that it won’t appear on your dashboard menu.
To hide a dashboard, when you have the Edit dashboard sidebar open, choose the Hidden option at the bottom of the settings tab and then click the save changes tick at the top of the sidebar.
Then, when you want to use it again you can make it visible by following the steps above and choosing the Active option.
Deleting a dashboard
If you have a dashboard that you no longer want to keep then you can permanently delete it.
To delete a dashboard, select Manage from the dashboard options dots in the top right corner. The Manage dashboards sidebar will open on the left of the screen.

Click on the cogs icon next to the dashboard you want to delete and then click the Delete dashboard button at the bottom of the sidebar.
| Glossary | |
|---|---|
| Avatar | Image used to represent a user online |
| Dashboard | Able+ page that allows you to display content of your choice |
| Widget | Container for content that you can add to a dashboard |
